Google Play Store
Requirements:
- Google Play Developer Account
- App setup on Google Play Console
- Google Cloud Project with Google Play Android Developer API enabled and linked to your Play Console account.
Connecting the Platform
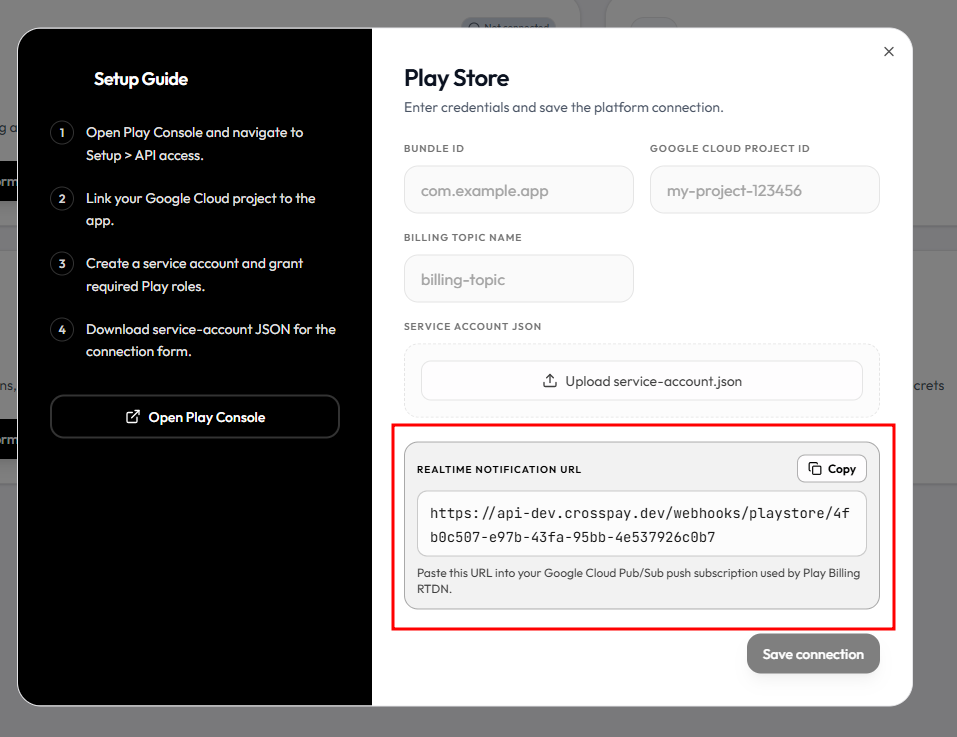
Section titled “Connecting the Platform”Go to Integrations > Google Play Store > Connect Platform (if not already connected). This will open a dialog with a form to fill out.
Bundle ID
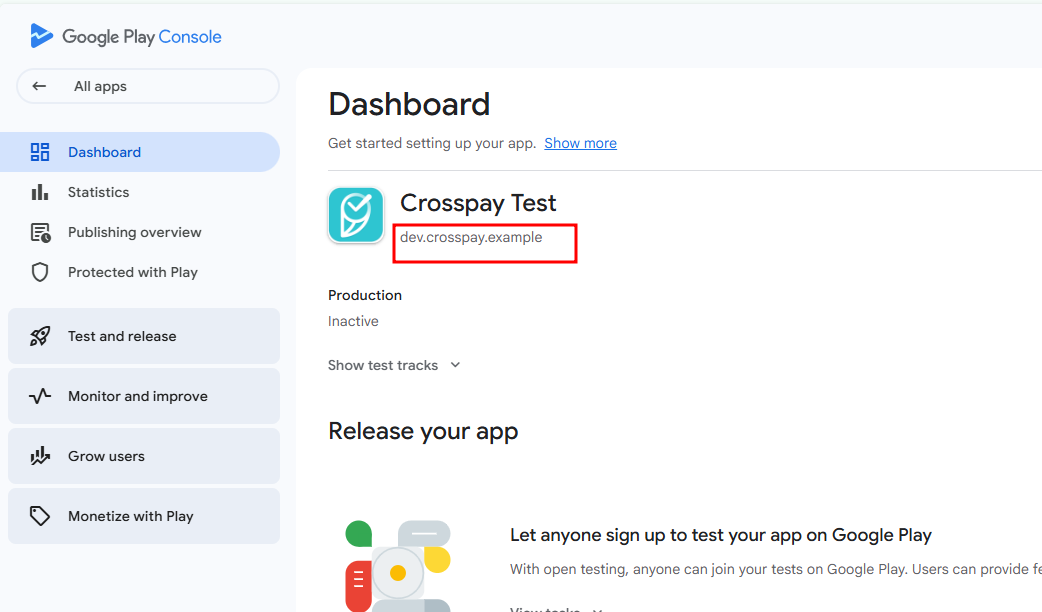
Section titled “Bundle ID”This is your application’s bundle id. It’s usually in com.company.example format and you can find it on Google Play Console > Select Your App.
On the dashboard you should see the bundle id right below the app name. It should be in the format com.company.example. Copy and paste it in the respective field in Crosspay form.
Google Cloud Project ID, Billing Topic Name and Service Account JSON
Section titled “Google Cloud Project ID, Billing Topic Name and Service Account JSON”To allow Crosspay to retrieve purchase information, transaction history and validating purchases for a given user, you need to create a service account in Google Cloud, and link it to your Play Console account.
- Go to Google Cloud Console and create a new project or select an existing one.
- Then in the dashboard, you’ll see the
Project IDright below the project name. Copy and paste it in the respective field in Crosspay form.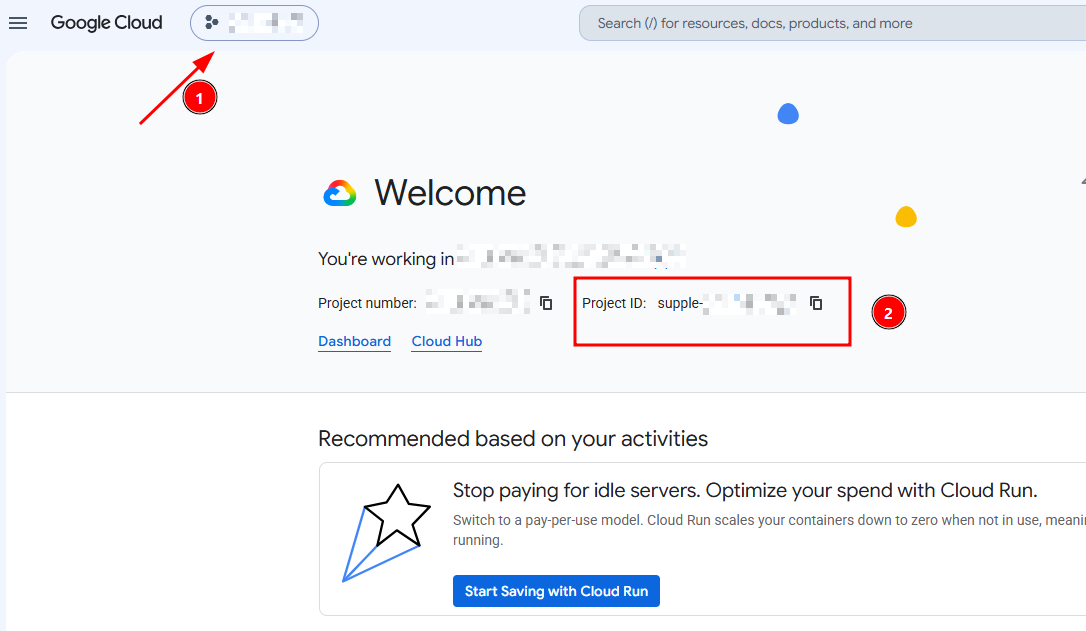
- Enable the “Google Play Android Developer API” for your project.
- Go to “IAM & Admin” > “Service Accounts” and create a new service account. Give it a name like “Crosspay Access”.
- For permissions, give it the
Pub/Sub Adminrole. - After creating the service account, click on it to open its details, then go to the “Keys” tab and create a new key in JSON format. This will download a JSON file to your computer. Make sure to store it securely, as it contains sensitive information.
- On the Details tab of the service account, you’ll also find the
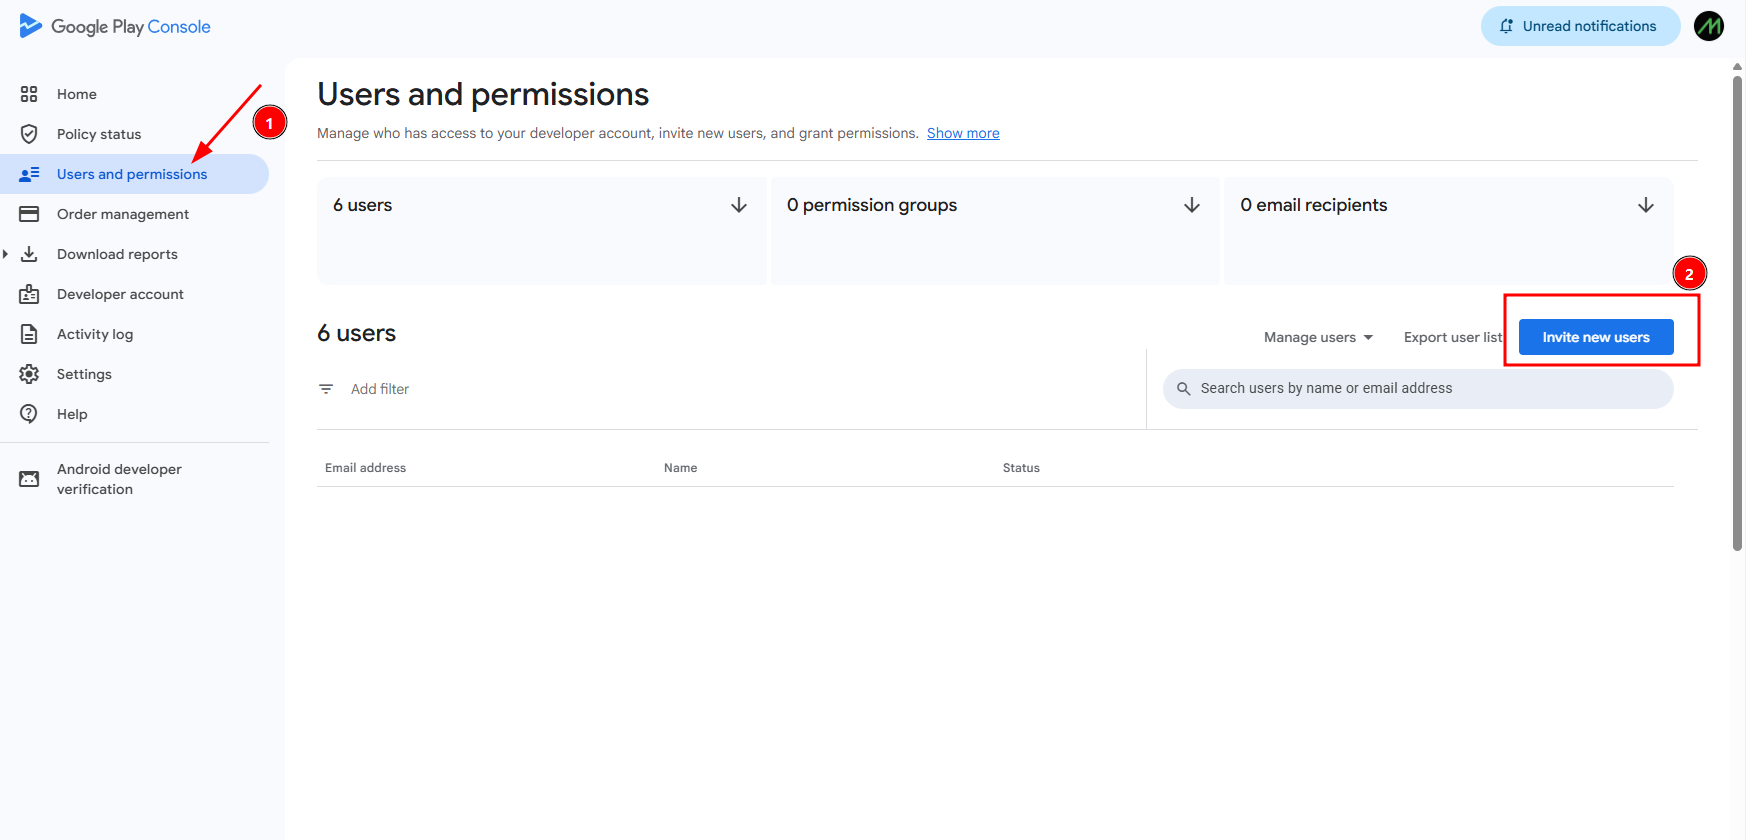
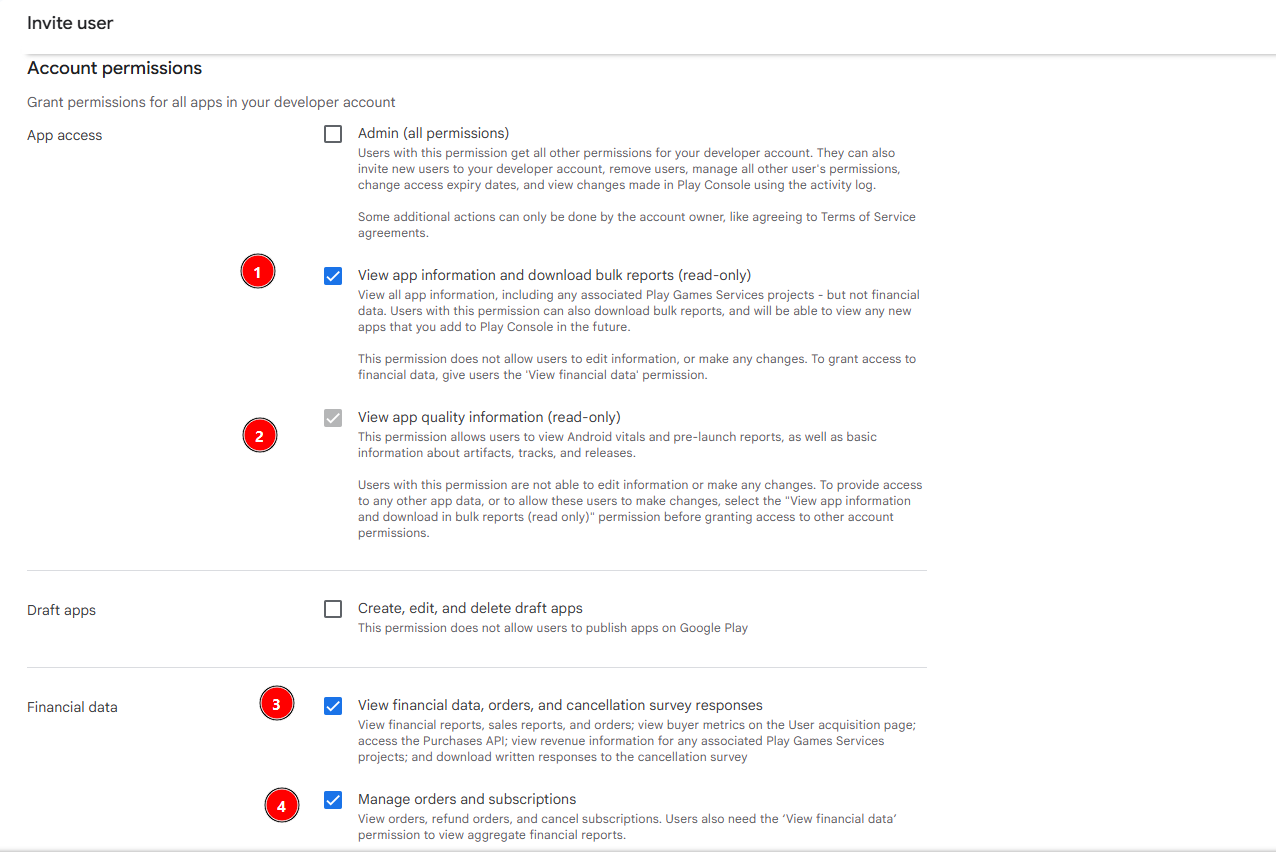
Emailfield. Copy the email address. - Go to your Google Play Console > Users and permissions > Invite new user. Paste the email address of the service account you just created, and give it following permissions for your specific app:
- View app information (read-only)
- View app quality information (read-only)
- View financial data
- Manage orders and subscriptions
So we’ve Service Account JSON and the Project ID.
Creating Billing Topic
Section titled “Creating Billing Topic”- Go to, Google Cloud Console > Pub/Sub > Topics > Create Topic
- Give it a name like
crosspay-billing-topicand create it. - After creating the topic, click on it to open its details, then copy the
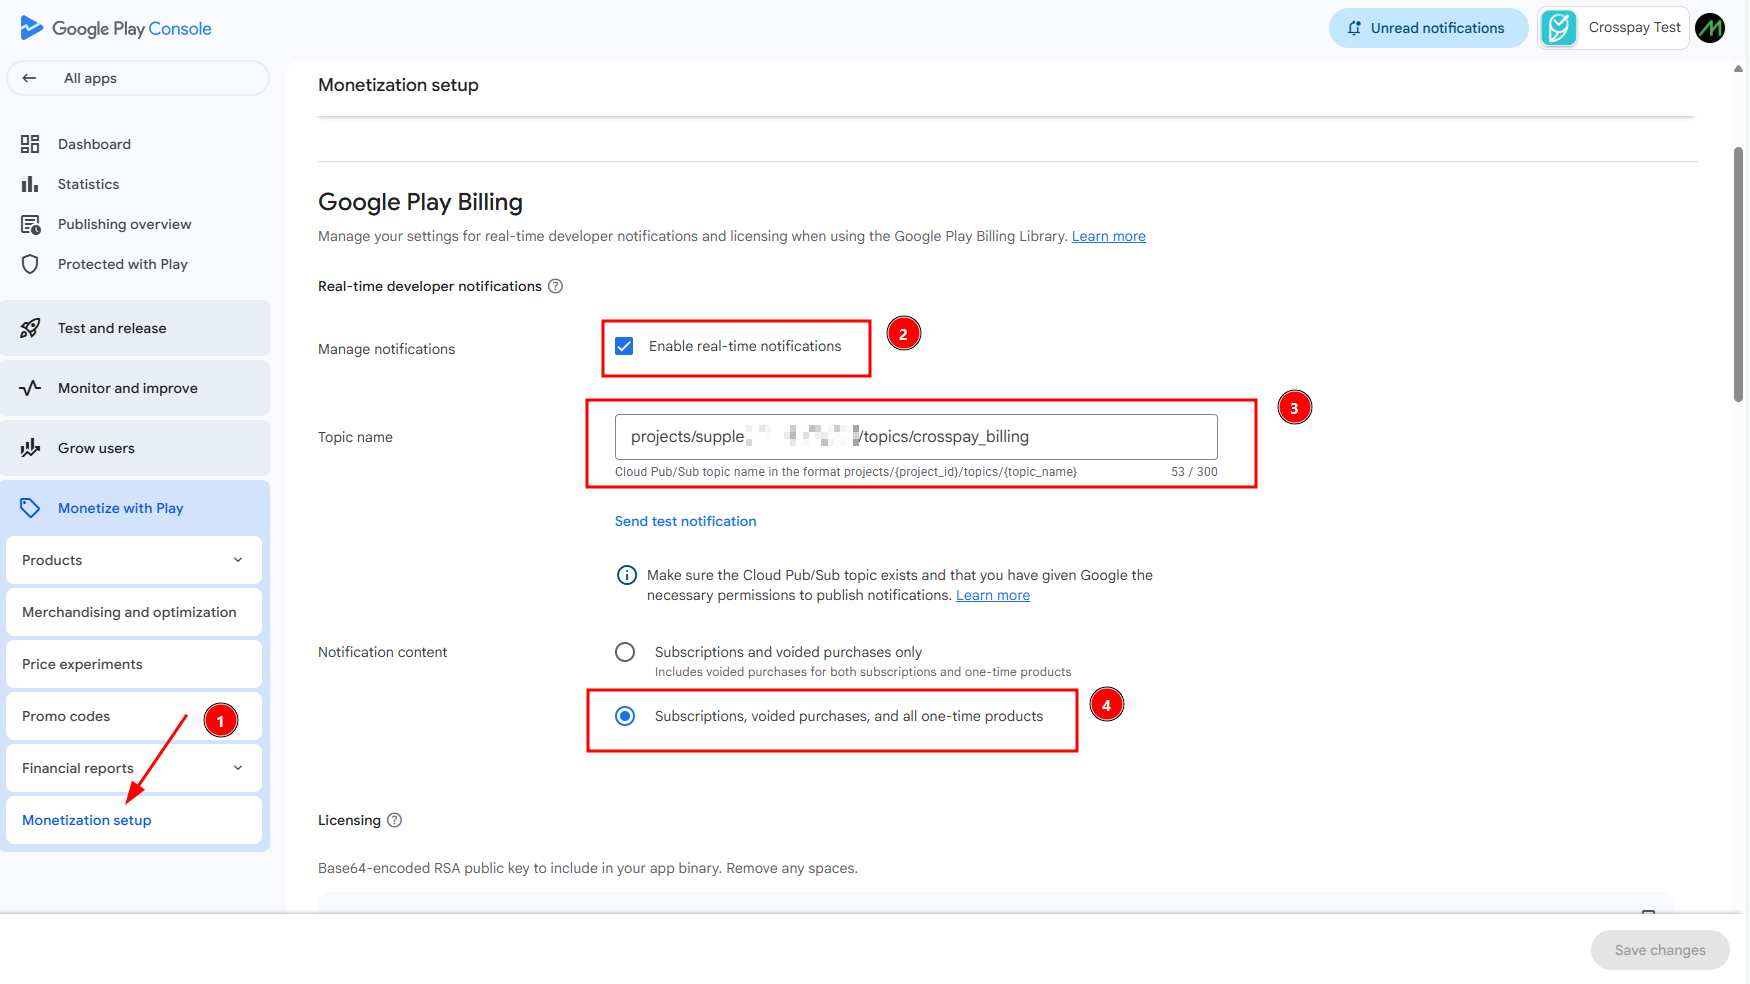
Topic name - In Google Play Console, select your app > go to “Monetize with Play” > “Monetization setup” > “Google Play Billing” > “Real-time developer notifications”
- Enable the real-time developer notifications and paste the topic name you just copied in the “Cloud Pub/Sub topic” field.
- Select
Subscriptions, voided purchases, and all one-time productsforNotification Contentand save it.
Finally, we’ve the Topic name.
Now enter the Project ID, Topic name and upload the Service Account JSON file in the respective fields in Crosspay form and save it.
Configuring Webhooks
Section titled “Configuring Webhooks”To allow Crosspay to receive real-time updates about purchases, subscription renewals, cancellations and other events, you need to set up subscriptions in Google Cloud Pub/Sub Console. These are known as Real-time developer notifications.
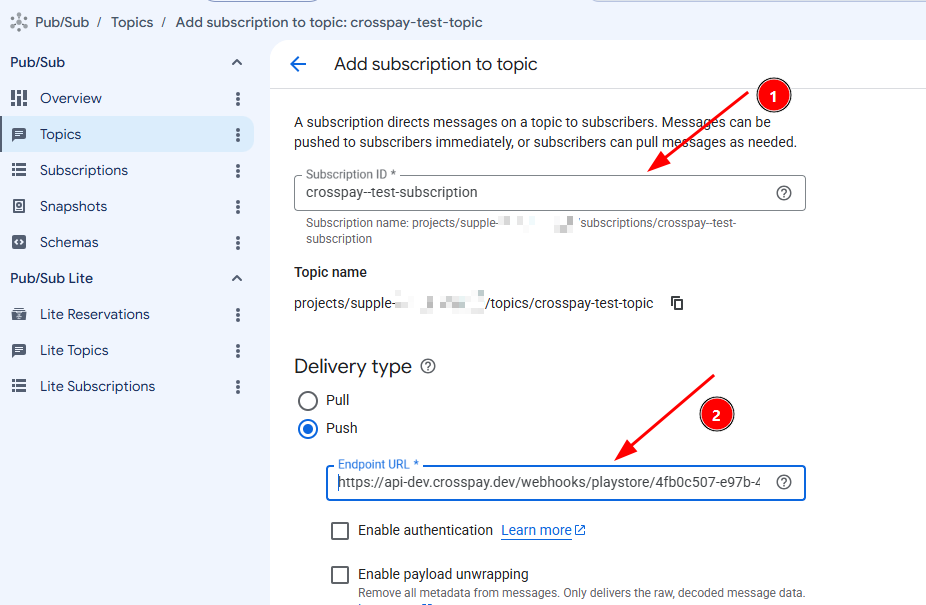
- Go to Google Cloud Console > Pub/Sub > Click on the topic you created for billing notifications > Click on “Create Subscription”
- Give the subscription a name like
crosspay-billing-subscription - For the “Delivery type”, select “Push”
- In the “Push endpoint” field, enter the
Realtime Notification URLfrom the Crosspay Google Play Store form. - Leave the other settings as default and create the subscription.
Now Google Cloud Pub/Sub will start sending real-time updates about purchases, subscription renewals, cancellations and other events to Crosspay. This will allow Crosspay to keep track of the state of your users’ purchases and subscriptions, and provide you with accurate and up-to-date information in your dashboard and through our API.