Apple App Store Product
Apple App Store Connect is the platform for managing your iOS and macOS applications, including in-app purchases and subscriptions. In Crosspay, you can create products that correspond to the in-app purchases or subscriptions you have set up in Apple App Store Connect, and link them to entitlements to manage access to features or content in your apps.
There are 3 types of products you can create for the Apple App Store in Crosspay:
- Consumable - A product that can be purchased multiple times, such as in-game currency or one-time use items.
- Non-Consumable - A product that can only be purchased once, such as a premium feature or a one-time upgrade.
- Subscription - A product that grants access to features or content for a specific period of time, and can be set to renew automatically until the user cancels.
Creating Subscriptions
Section titled “Creating Subscriptions”Subscriptions in the Apple App Store are created as auto-renewable subscriptions. To create a subscription product in Crosspay, you need to first set up the subscription in Apple App Store Connect, and then link it to an entitlement in Crosspay.
To create a subscription product in Crosspay, follow these steps:
- Go to AppStoreConnect > Select your app, on the sidebar go to App Store > Monetization > Subscriptions.
- Now we need to create a subscription group (if doesn’t exists already). Use the
+button next to the title, and give it a good reference name likebase subscriptions.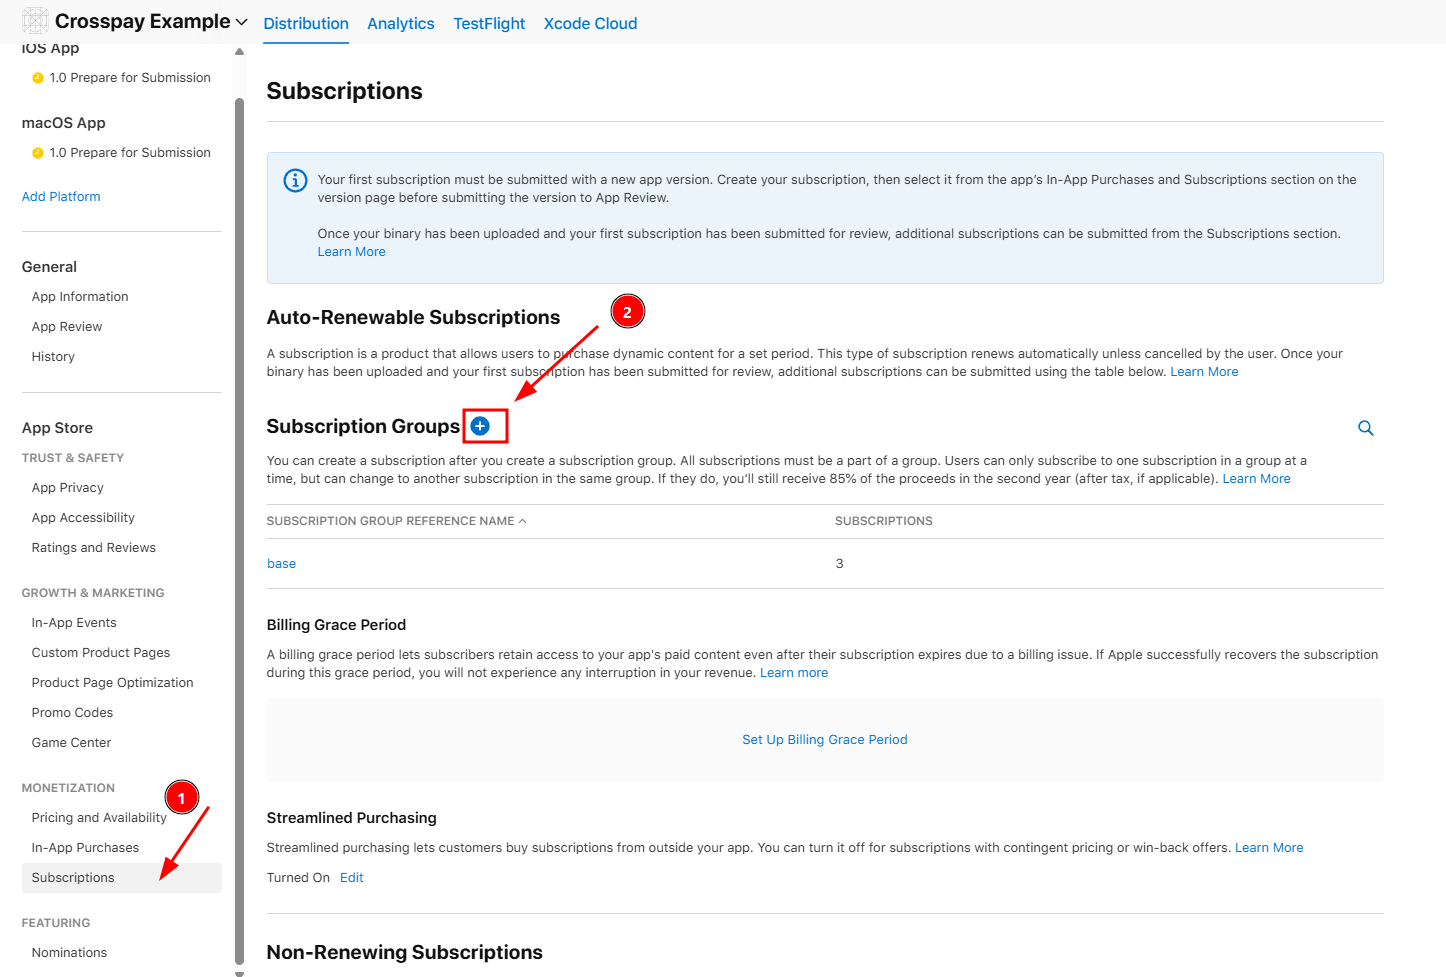
- Go to that newly created or existing subscription group
- Create a new subscription by clicking the
+button next to the title.- For
Reference Name, use a good reference name e.g.Premium Monthly - For
Product ID, use a unique identifier that you will use to link this subscription to an entitlement in Crosspay, e.g.com.example.example.premium.monthly. - For
Subscription Duration, select the appropriate duration for your subscription (e.g. 1 month).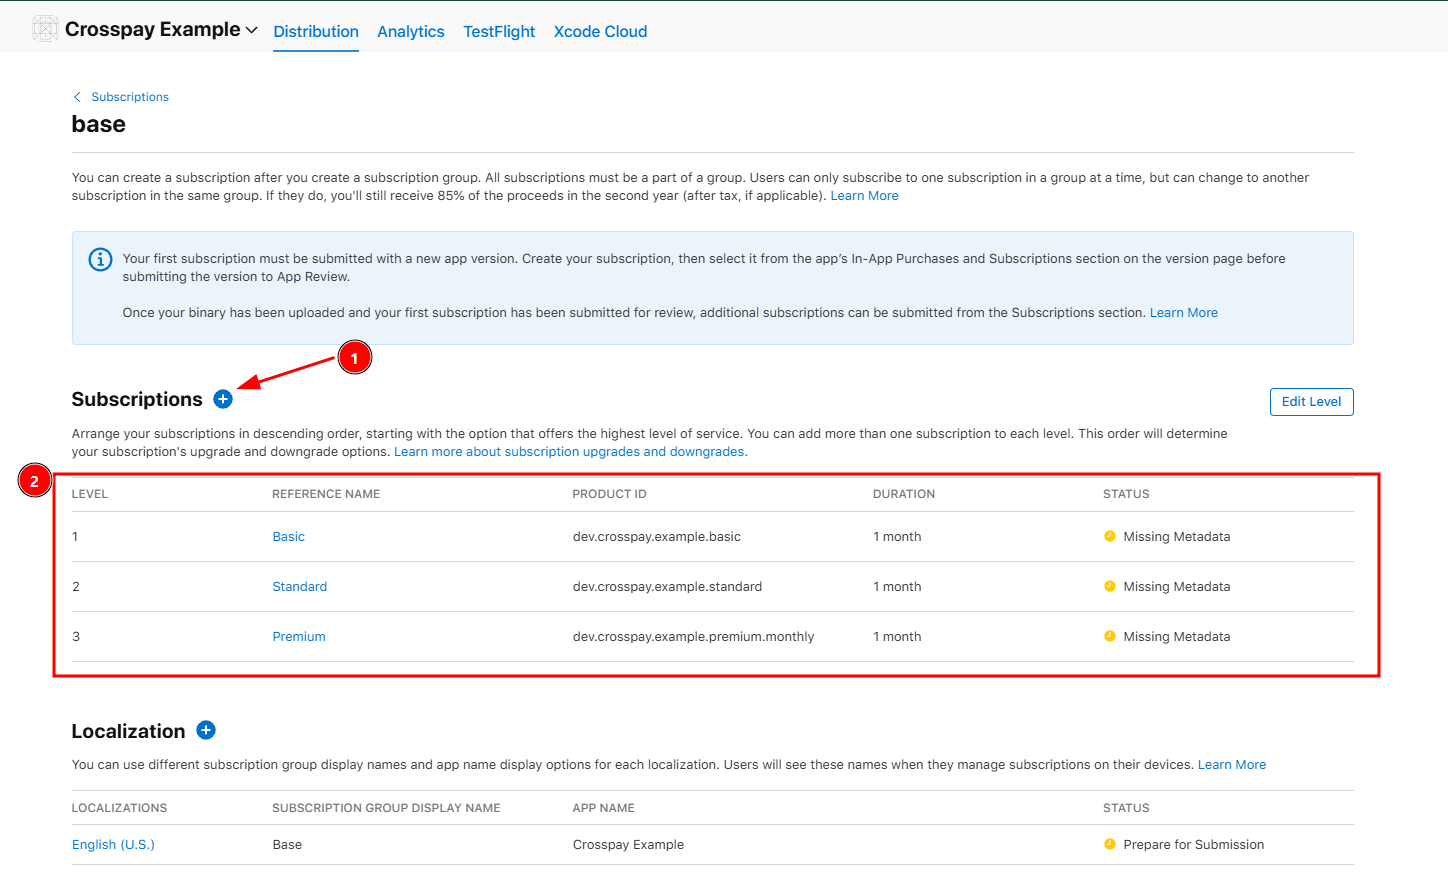
- For
- Now we have our subscription in a
DRAFTstate - Setup Availability, set the countries your subscription will be available in.
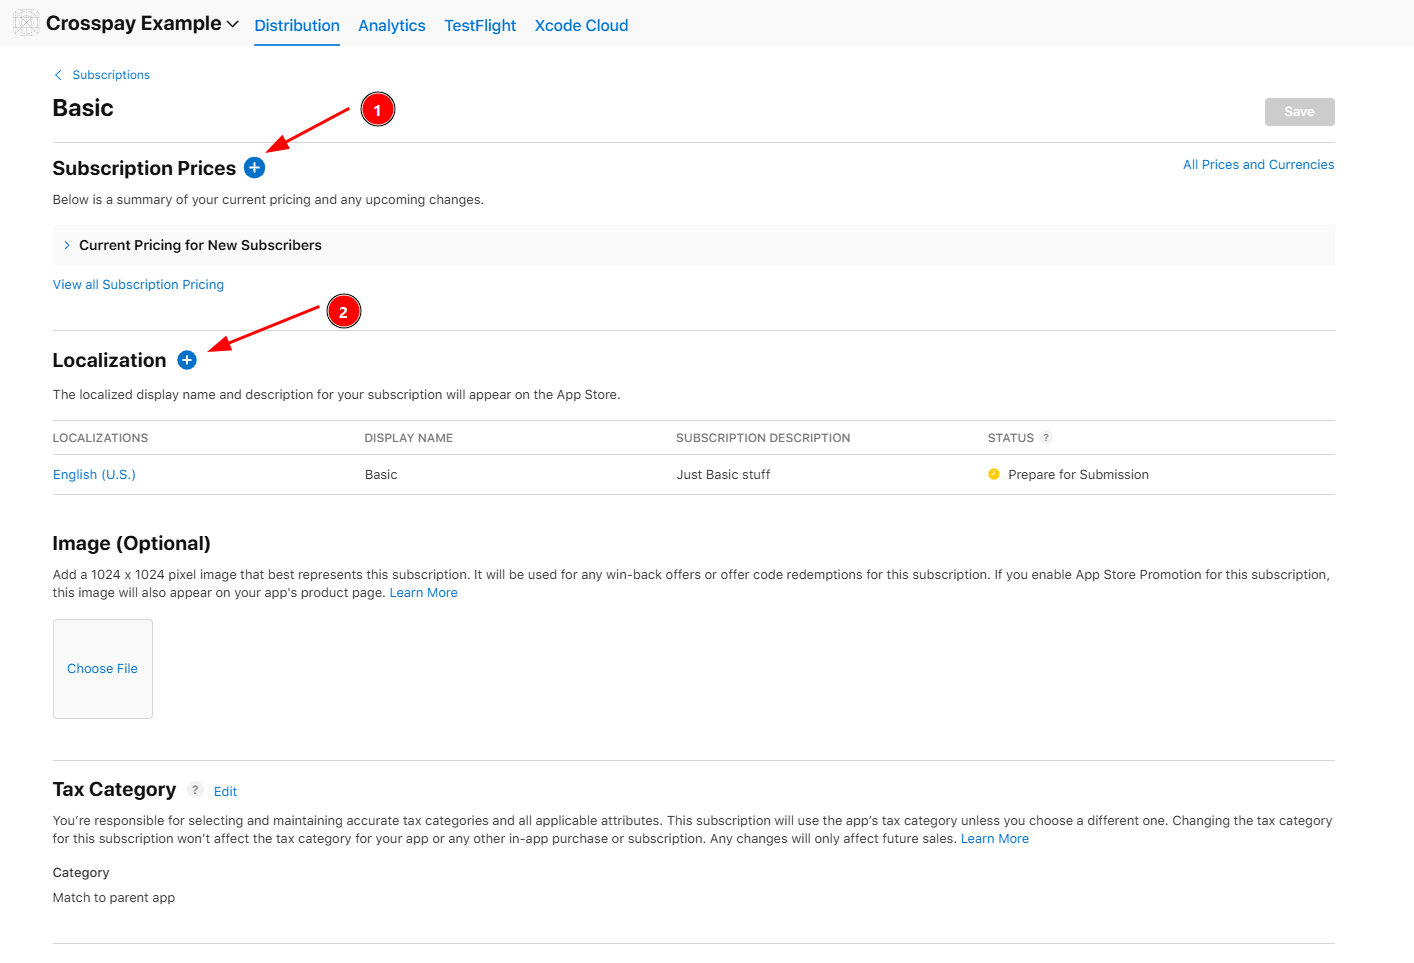
- For setting the price,
- click on the
Add Subscription Pricebutton - Select the appropriate price for your subscription in the
Pricefield and the base currency through theCountry or Regionfield. - On the next page, you configure the price for each region/country if needed.
- Finally Confirm the price and you should see the price you set in the subscription details page.
- click on the
- Add Localization for the subscription by clicking on the
Add Localizationbutton, and filling in the required fields.
You can also setup Introductory Offers, Promotional Offers, and Subscription Offers for your subscription if needed.
Read the official Apple documentation for more details on how to set up subscriptions in Apple App Store Connect: Auto-Renewable Subscriptions.
Creating Consumables and Non-Consumables
Section titled “Creating Consumables and Non-Consumables”Consumable products are created as in-app purchases in Apple App Store Connect. To create a consumable product in Crosspay, you need to first set up the in-app purchase in Apple App Store Connect, and then link it to an entitlement in Crosspay.
To create a consumable product in Crosspay, follow these steps:
- Go to AppStoreConnect > Select your app, on the sidebar go to App Store > Monetization > In-App Purchases.
- Click on the
+button next to the title. The form to create a new in-app purchase will open.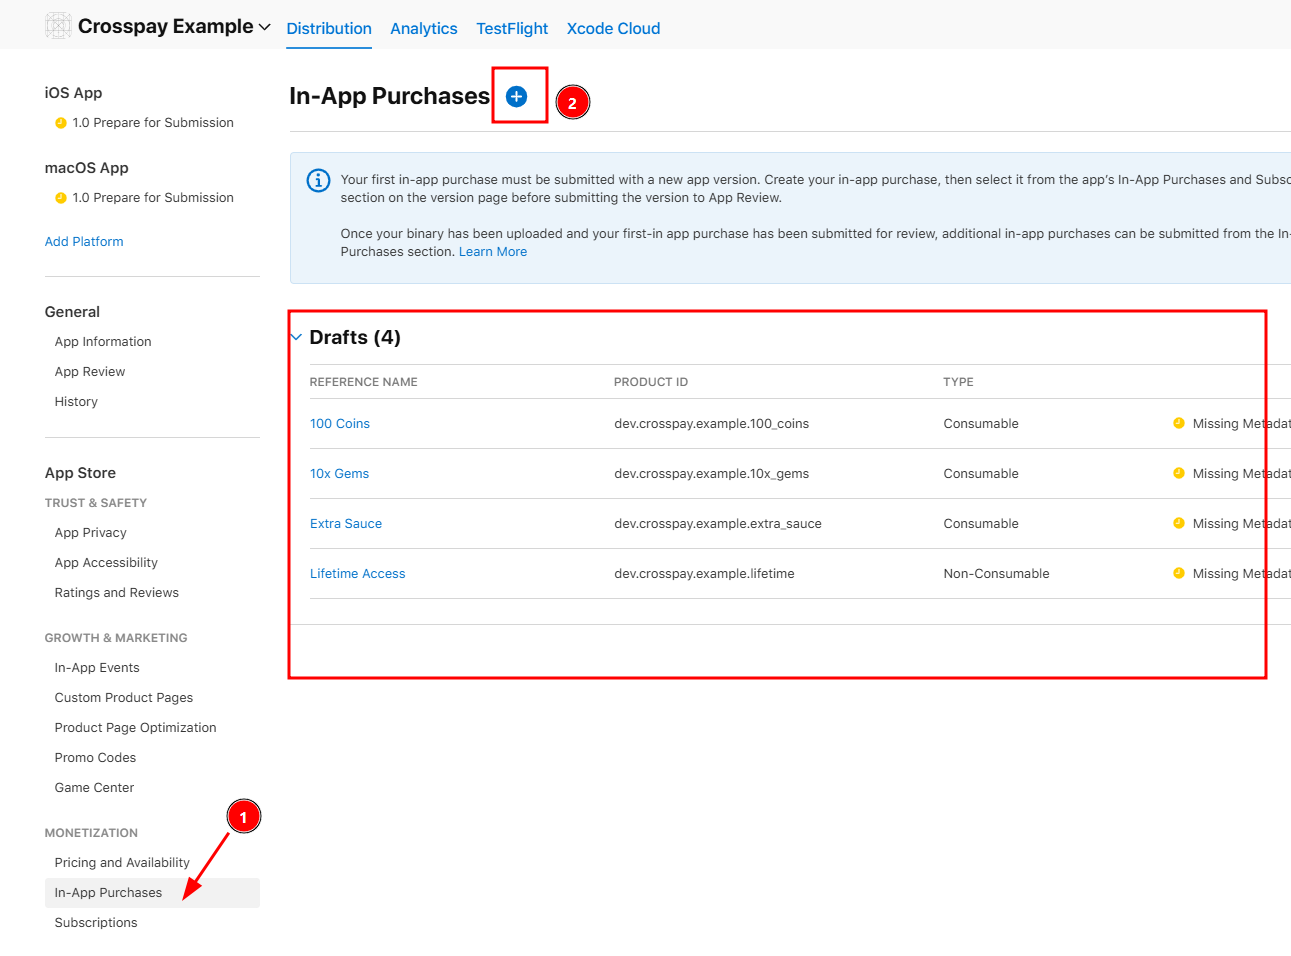
- Type: Select
ConsumableorNon-Consumabledepending on the type of product you want to create. - Reference Name: a good reference name for your in-app purchase, e.g.
100 CoinsorLifetime Access. - Product ID: a unique identifier that you will use to link this in-app purchase to an entitlement in Crosspay, e.g.
com.example.example.100_coinsorcom.example.example.lifetime_access. - Click
Createto create the in-app purchase.
- Type: Select
- Now we have our in-app purchase in a
DRAFTstate. - Setup Availability, set the countries your in-app purchase will be available in.
- For setting the price,
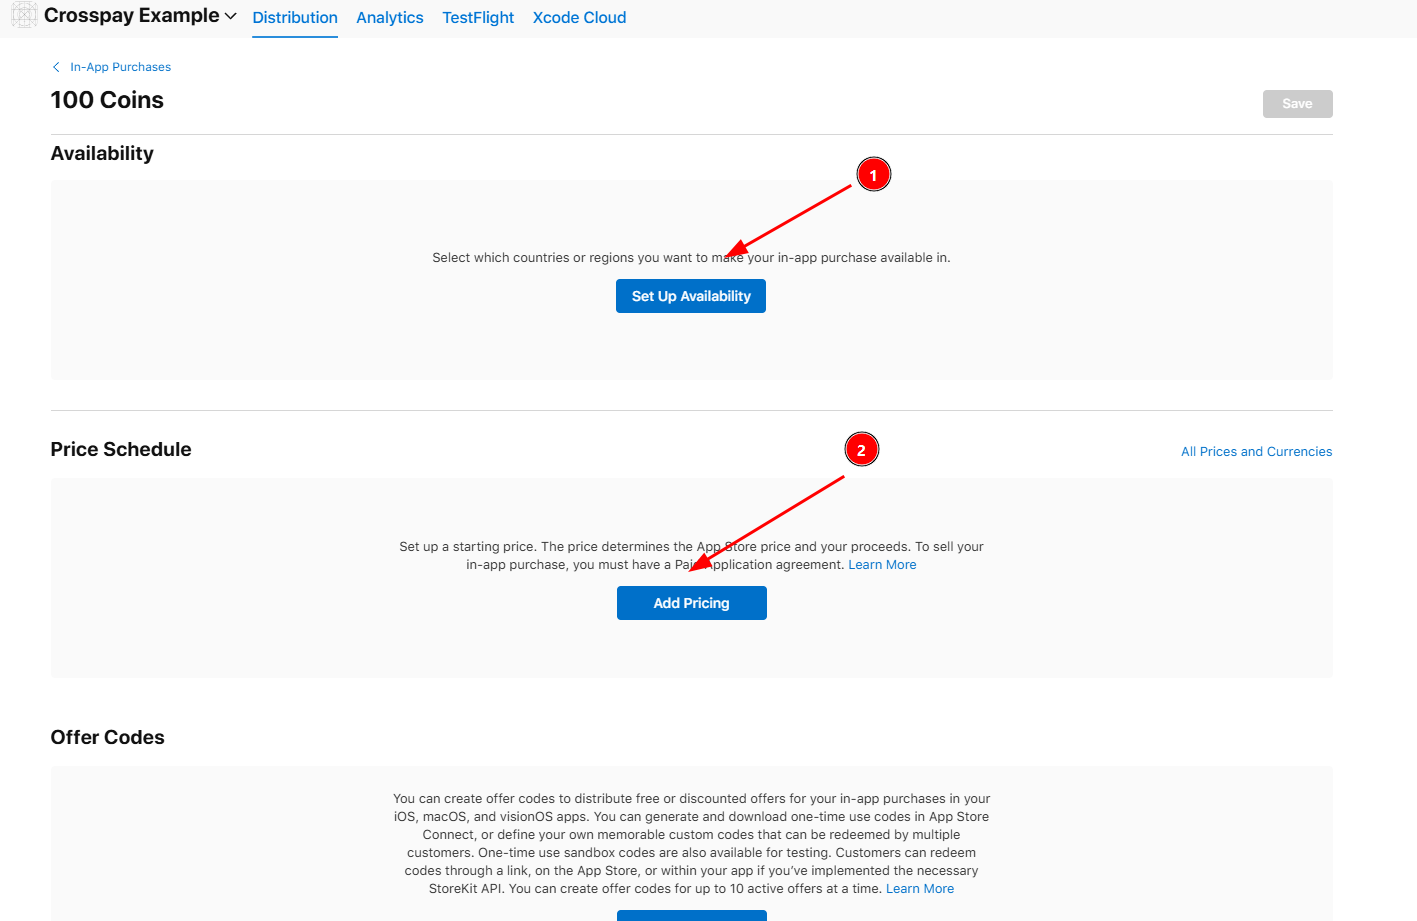
- click on the
Add Pricingbutton inPrice Schedulesection. - Select the appropriate price for your in-app purchase in the
Pricefield and the base currency through theCountry or Regionfield. - On the next page, you configure the price for each region/country if needed.
- Finally Confirm the price and you should see the price you set in the in-app purchase details page.
- click on the
- Add Localization for the in-app purchase by clicking on the
Add Localizationbutton, and filling in the required fields.
You can also setup Promotional Offers for your in-app purchase if needed.
Read the official Apple documentation for more details on how to set up in-app purchases in Apple App Store Connect: In-App Purchases.
Linking to Entitlements
Section titled “Linking to Entitlements”After your subscriptions & in-app purchases are created in Apple App Store Connect, these are ready to be linked with Crosspay, yay!
- If you go the Crosspay Products Page you’ll find the Apple App Store section with a button to create a new product.
- You will see the newly created subscription/in-app purchase is listed there, click it, and save it!
Now your subscription/in-app purchase is linked with Crosspay!!