Apple App Store Connect
Requirements:
Make sure to meet the requirements before starting the configuration.
Connecting the Platform
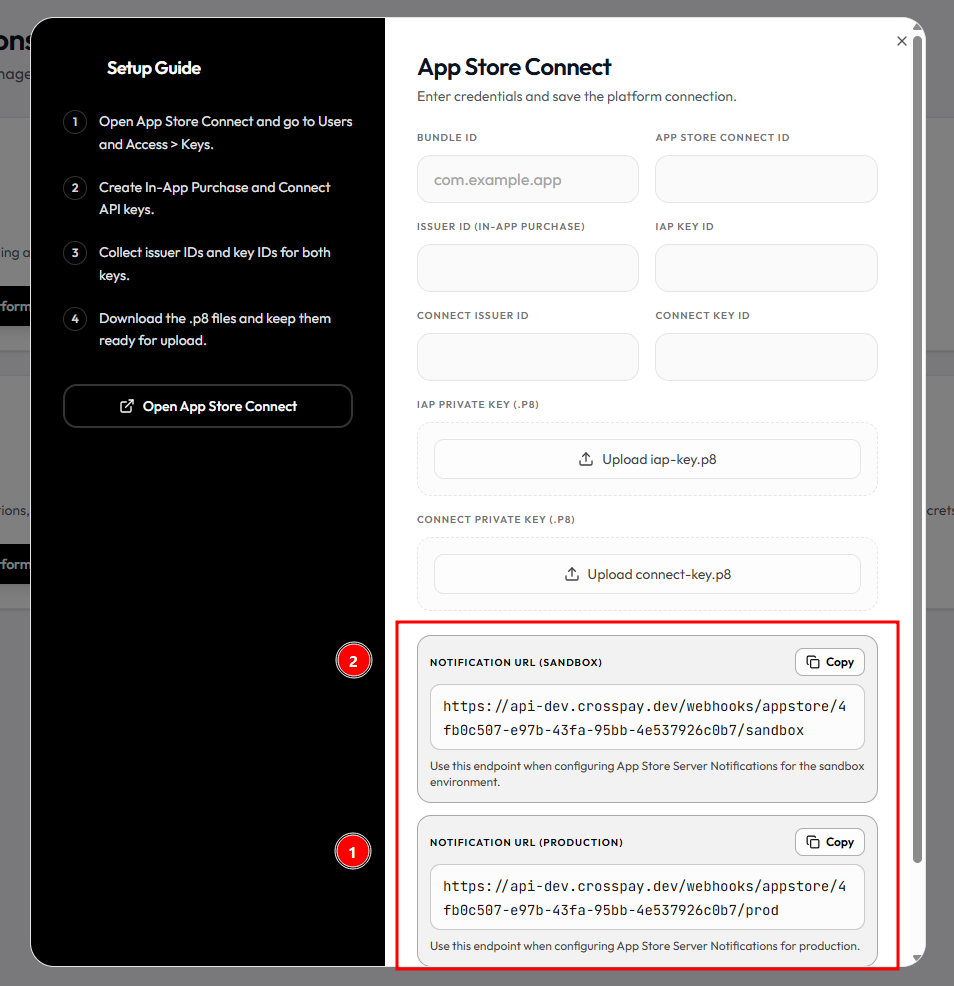
Section titled “Connecting the Platform”Go to Integrations > App Store Connect > Connect Platform (if not already connected). This will open a dialog with a form to fill out.
You’ll see it requires quite a lot of information to configure the store. Don’t be scared, we will guide you to get all of this information.
Bundle ID
Section titled “Bundle ID”This is your application’s bundle id. It’s usually in com.company.example format and you can find it on AppStoreConnect > Select Your App, on the Sidebar, General > App Information > General Information section.
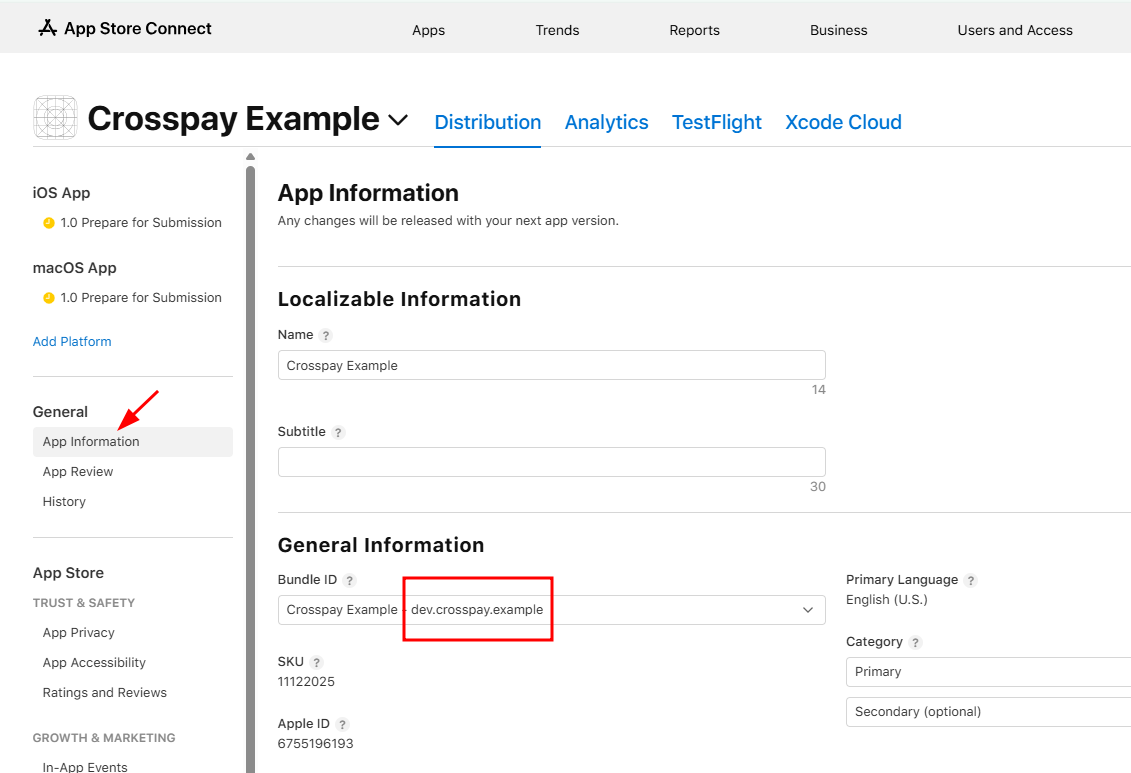
App Store Connect ID
Section titled “App Store Connect ID”The numeric identifier assigned by AppStore. You can find it below the Bundle field, labeled “Apple ID”.
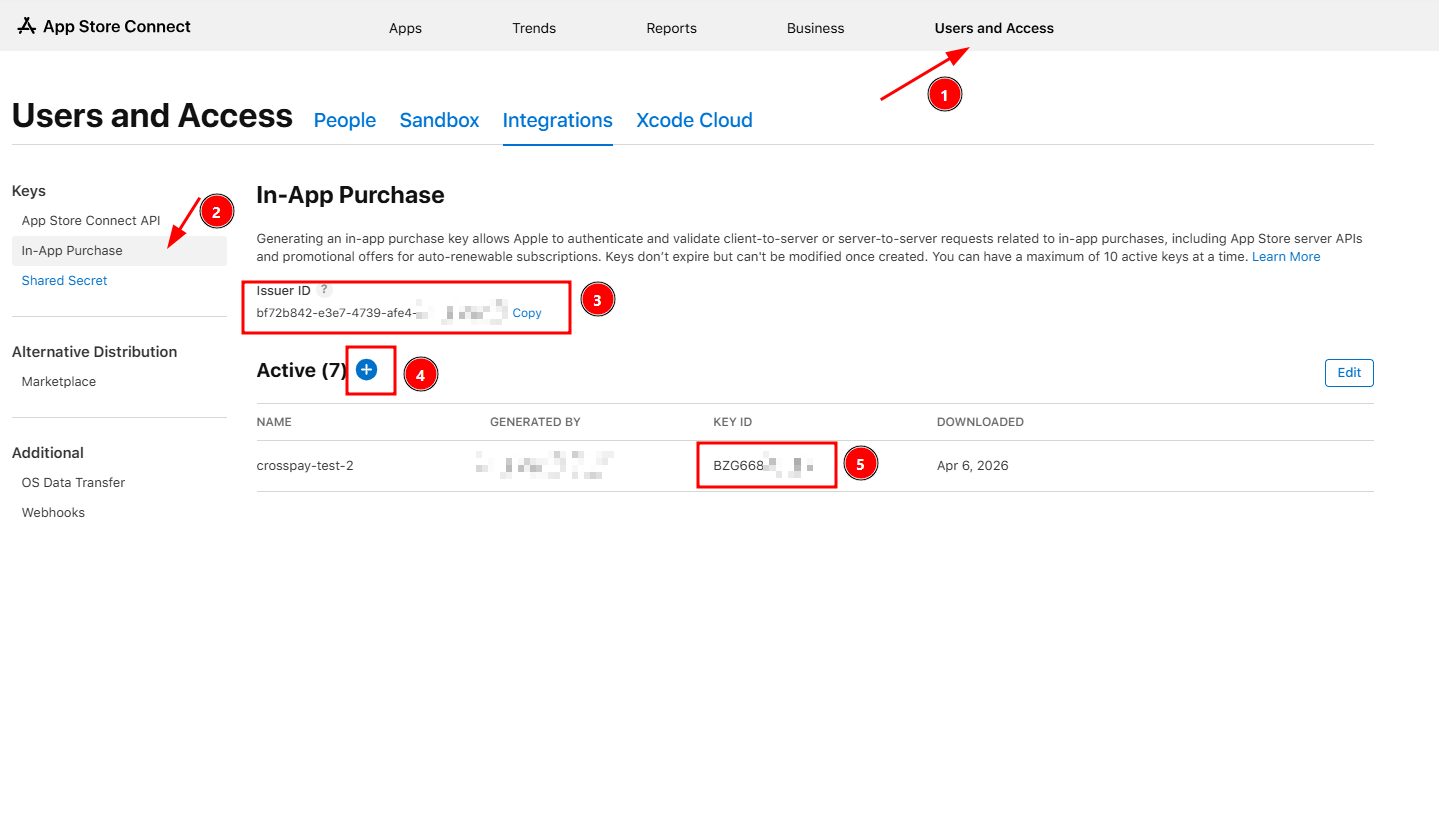
Issuer ID (In-App Purchase), IAP Key ID and IAP Private Key (.p8)
Section titled “Issuer ID (In-App Purchase), IAP Key ID and IAP Private Key (.p8)”These 3 fields are tied together. IAP or In-app purchases Key is kind of an API Key which allows Crosspay to retrieve purchase information, transaction history and validating purchases for a given user.
To create this key:
- Go to AppStoreConnect > Users and Access > Integrations > In-App Purchases or go to this url
- From there, you’ll first find the
Issuer ID. - Then, click on the
+orGenerate Key. Give it a proper name, likeCrosspay Accessso you don’t accidentally revoke it. - After the key is generated, it can be downloaded once. Make sure to download it, and properly store it.
- You’ll also find the
Key IDin that page next the key you just created. - Now enter these details in the respective fields in the form. Make sure to upload the key you just generated in that form in crosspay dashboard.
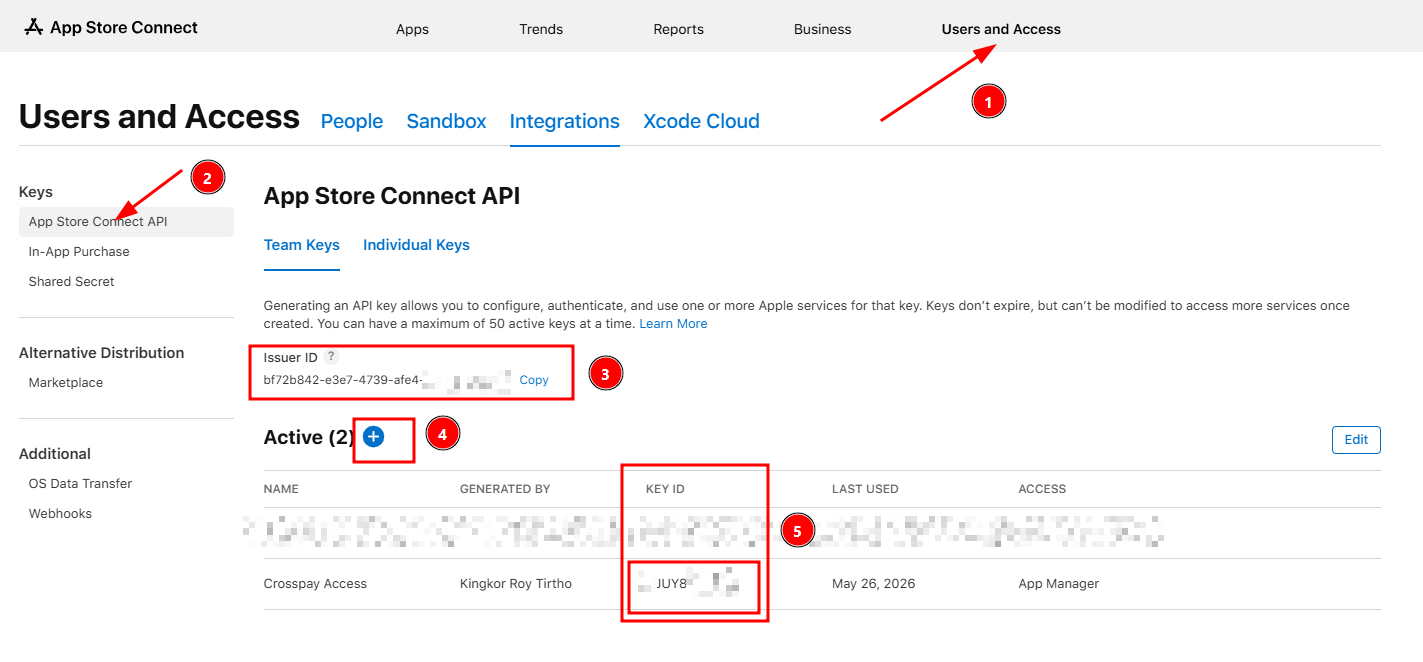
Connect Issuer ID, Connect Key ID and Connect Private Key (.p8)
Section titled “Connect Issuer ID, Connect Key ID and Connect Private Key (.p8)”These 3 fields are also tied together, but they are used for a different purpose. These are for retrieving product information for your easier configuration of products in the dashboard later. It also helps us knowing product status so we can alert you about your products not being approved or in a draft state.
To create this key:
- Go to AppStoreConnect > Users and Access > Integrations > App Store Connect API or go to this url
- From there, you’ll again first find the
Issuer IDwhich should be the same as before. - Then, click on the
+orGenerate Key. Give it a proper name, likeCrosspay Accessso you don’t accidentally revoke it. - After the key is generated, it also can be downloaded only once. Make sure to download it, and properly store it too.
- You’ll again find the
Key IDin that page next the key you just created. - Now enter these details in the respective fields in the form. Make sure to upload the key you just generated in that form in crosspay dashboard.
Configuring Webhooks
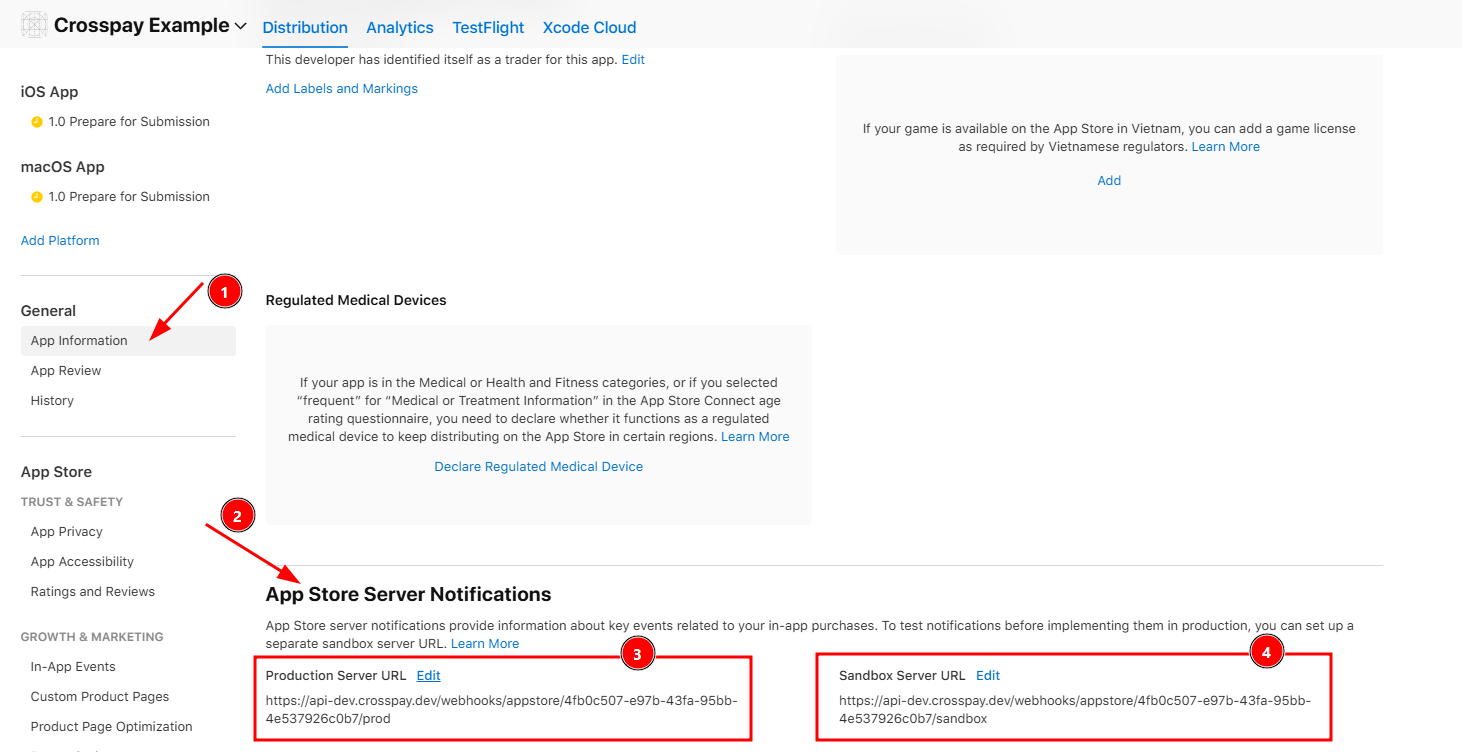
Section titled “Configuring Webhooks”To allow Crosspay to receive real-time updates about purchases, subscription renewals, cancellations and other events, you need to set up webhooks in AppStoreConnect. These are known as App Store Server Notifications.
- You will see 2 fields on the Crosspay AppStoreConnect form, named
Notification URL (Sandbox)andNotification URL (Production). - These are the URLs that you need to enter in AppStoreConnect to allow it sending notifications to Crosspay.
- Go to AppStoreConnect > Select Your App > General > App Information > Scroll to very bottom and you’ll find the
App Store Server Notificationssection. - Click on
Editand you’ll see fields to enter the URLs. Enter the respective URLs from the Crosspay form in the respective fields in AppStoreConnect dashboard. - Put the Sandbox URL in the Sandbox field and the Production URL in the Production field. Then click on
Save.
Now Crosspay will start receiving real-time updates about purchases, subscription renewals, cancellations and other events from AppStoreConnect. This will allow Crosspay to keep track of the state of your users’ purchases and subscriptions, and provide you with accurate and up-to-date information in your dashboard and through our API.